DIY Tutorial: Modern Easter Nail Art

Jin Soon Choi, Manicurist and Founder of nail polish line JINsoon, was inspired by the cheerful colors of Spring to create this modern day Easter themed nail look, perfect for any sunny activities you have planned!
Keep scrolling to see the step-by-step tutorial to create this bright and colorful easter nail art look at home!
How- To: Modern Easter Nail Art
Step 1: Apply JINsoon Power Coat Base Coat
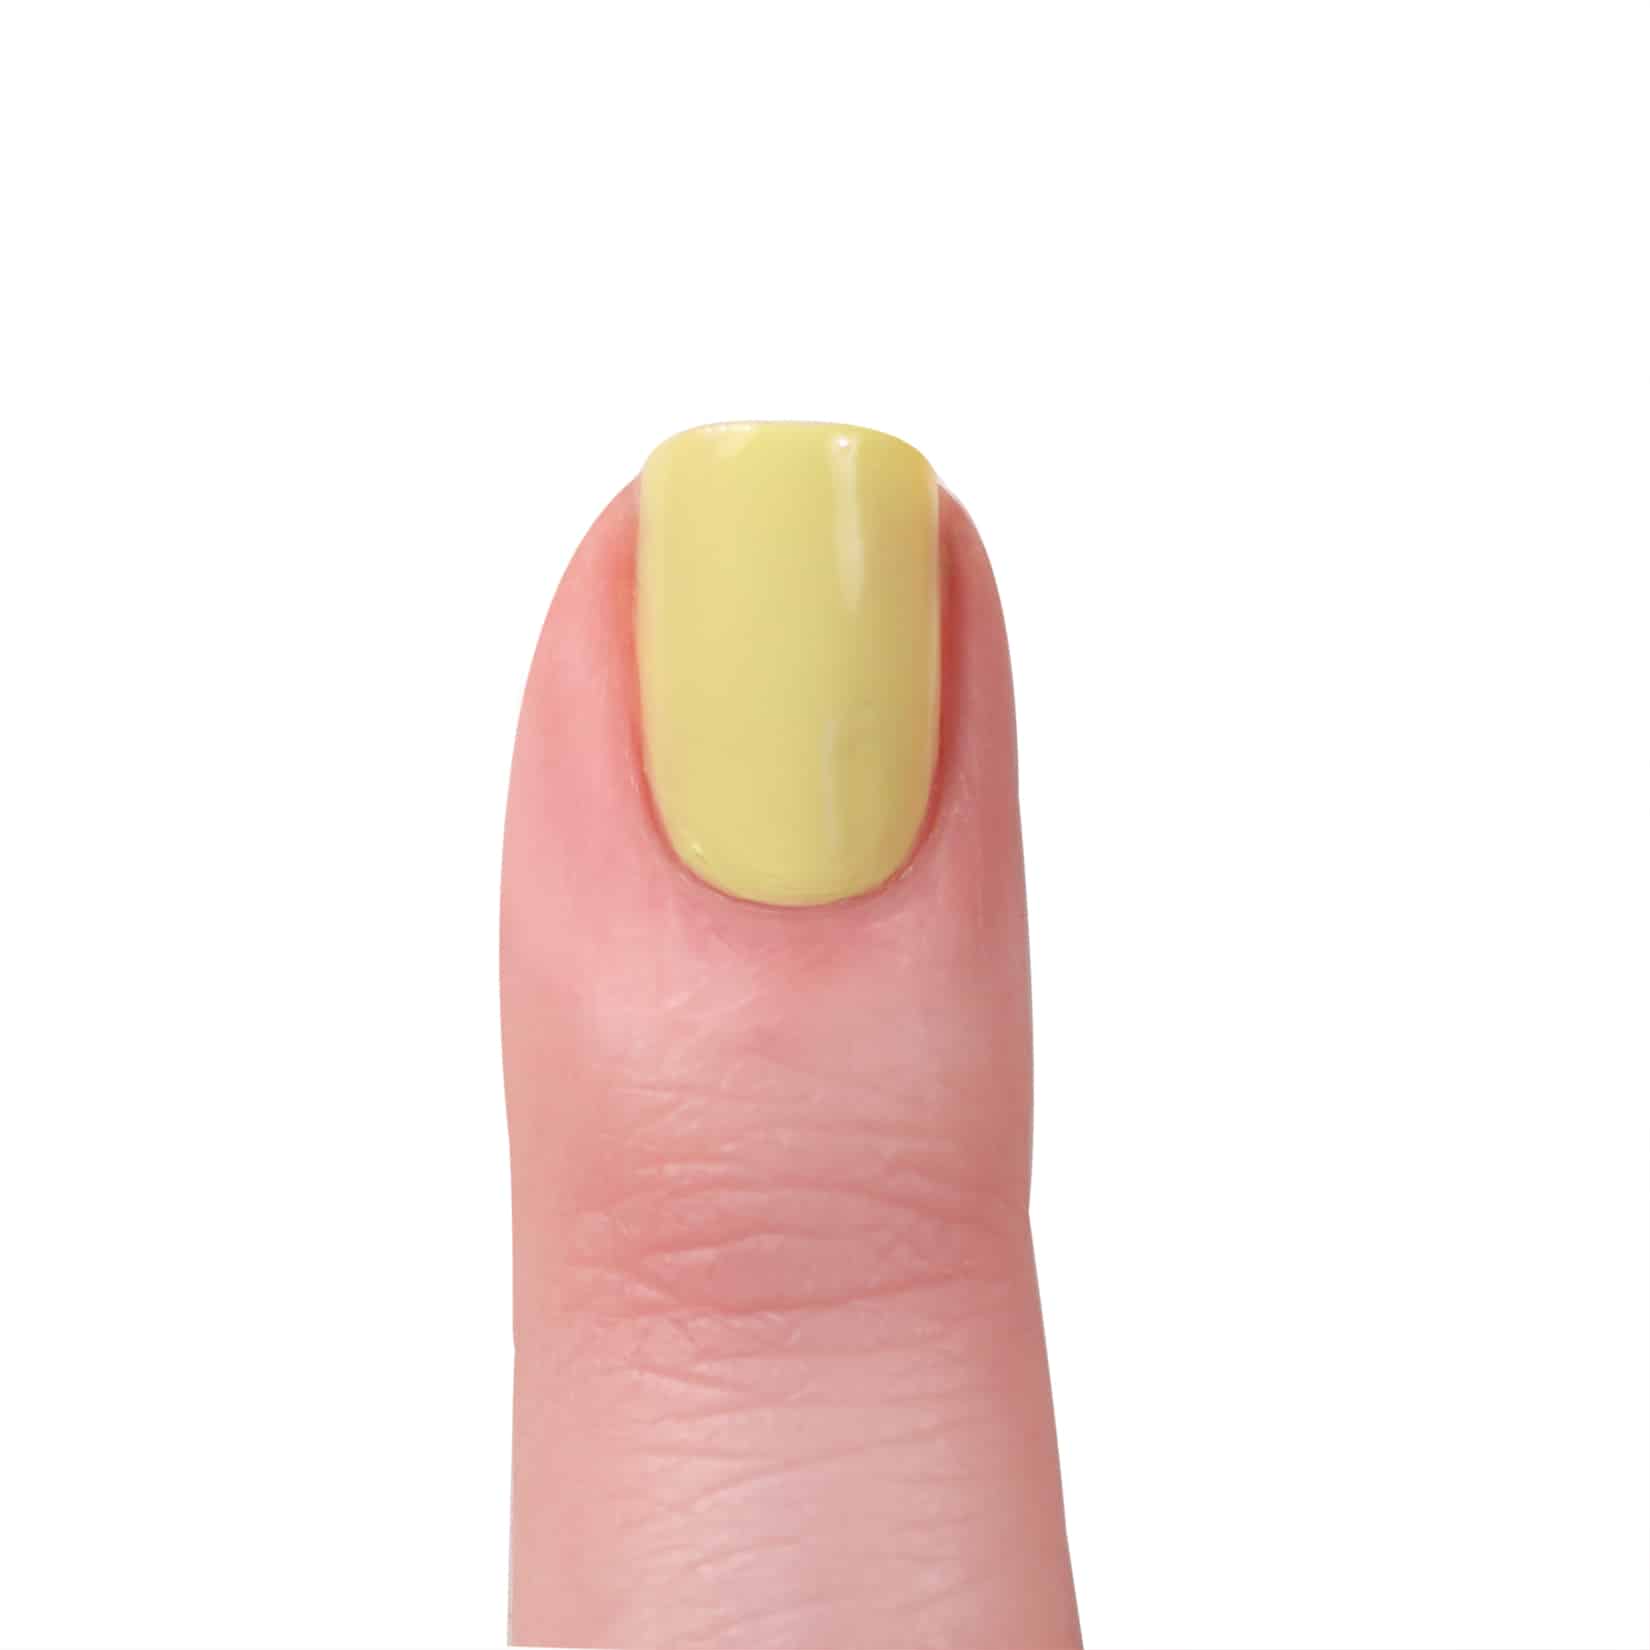
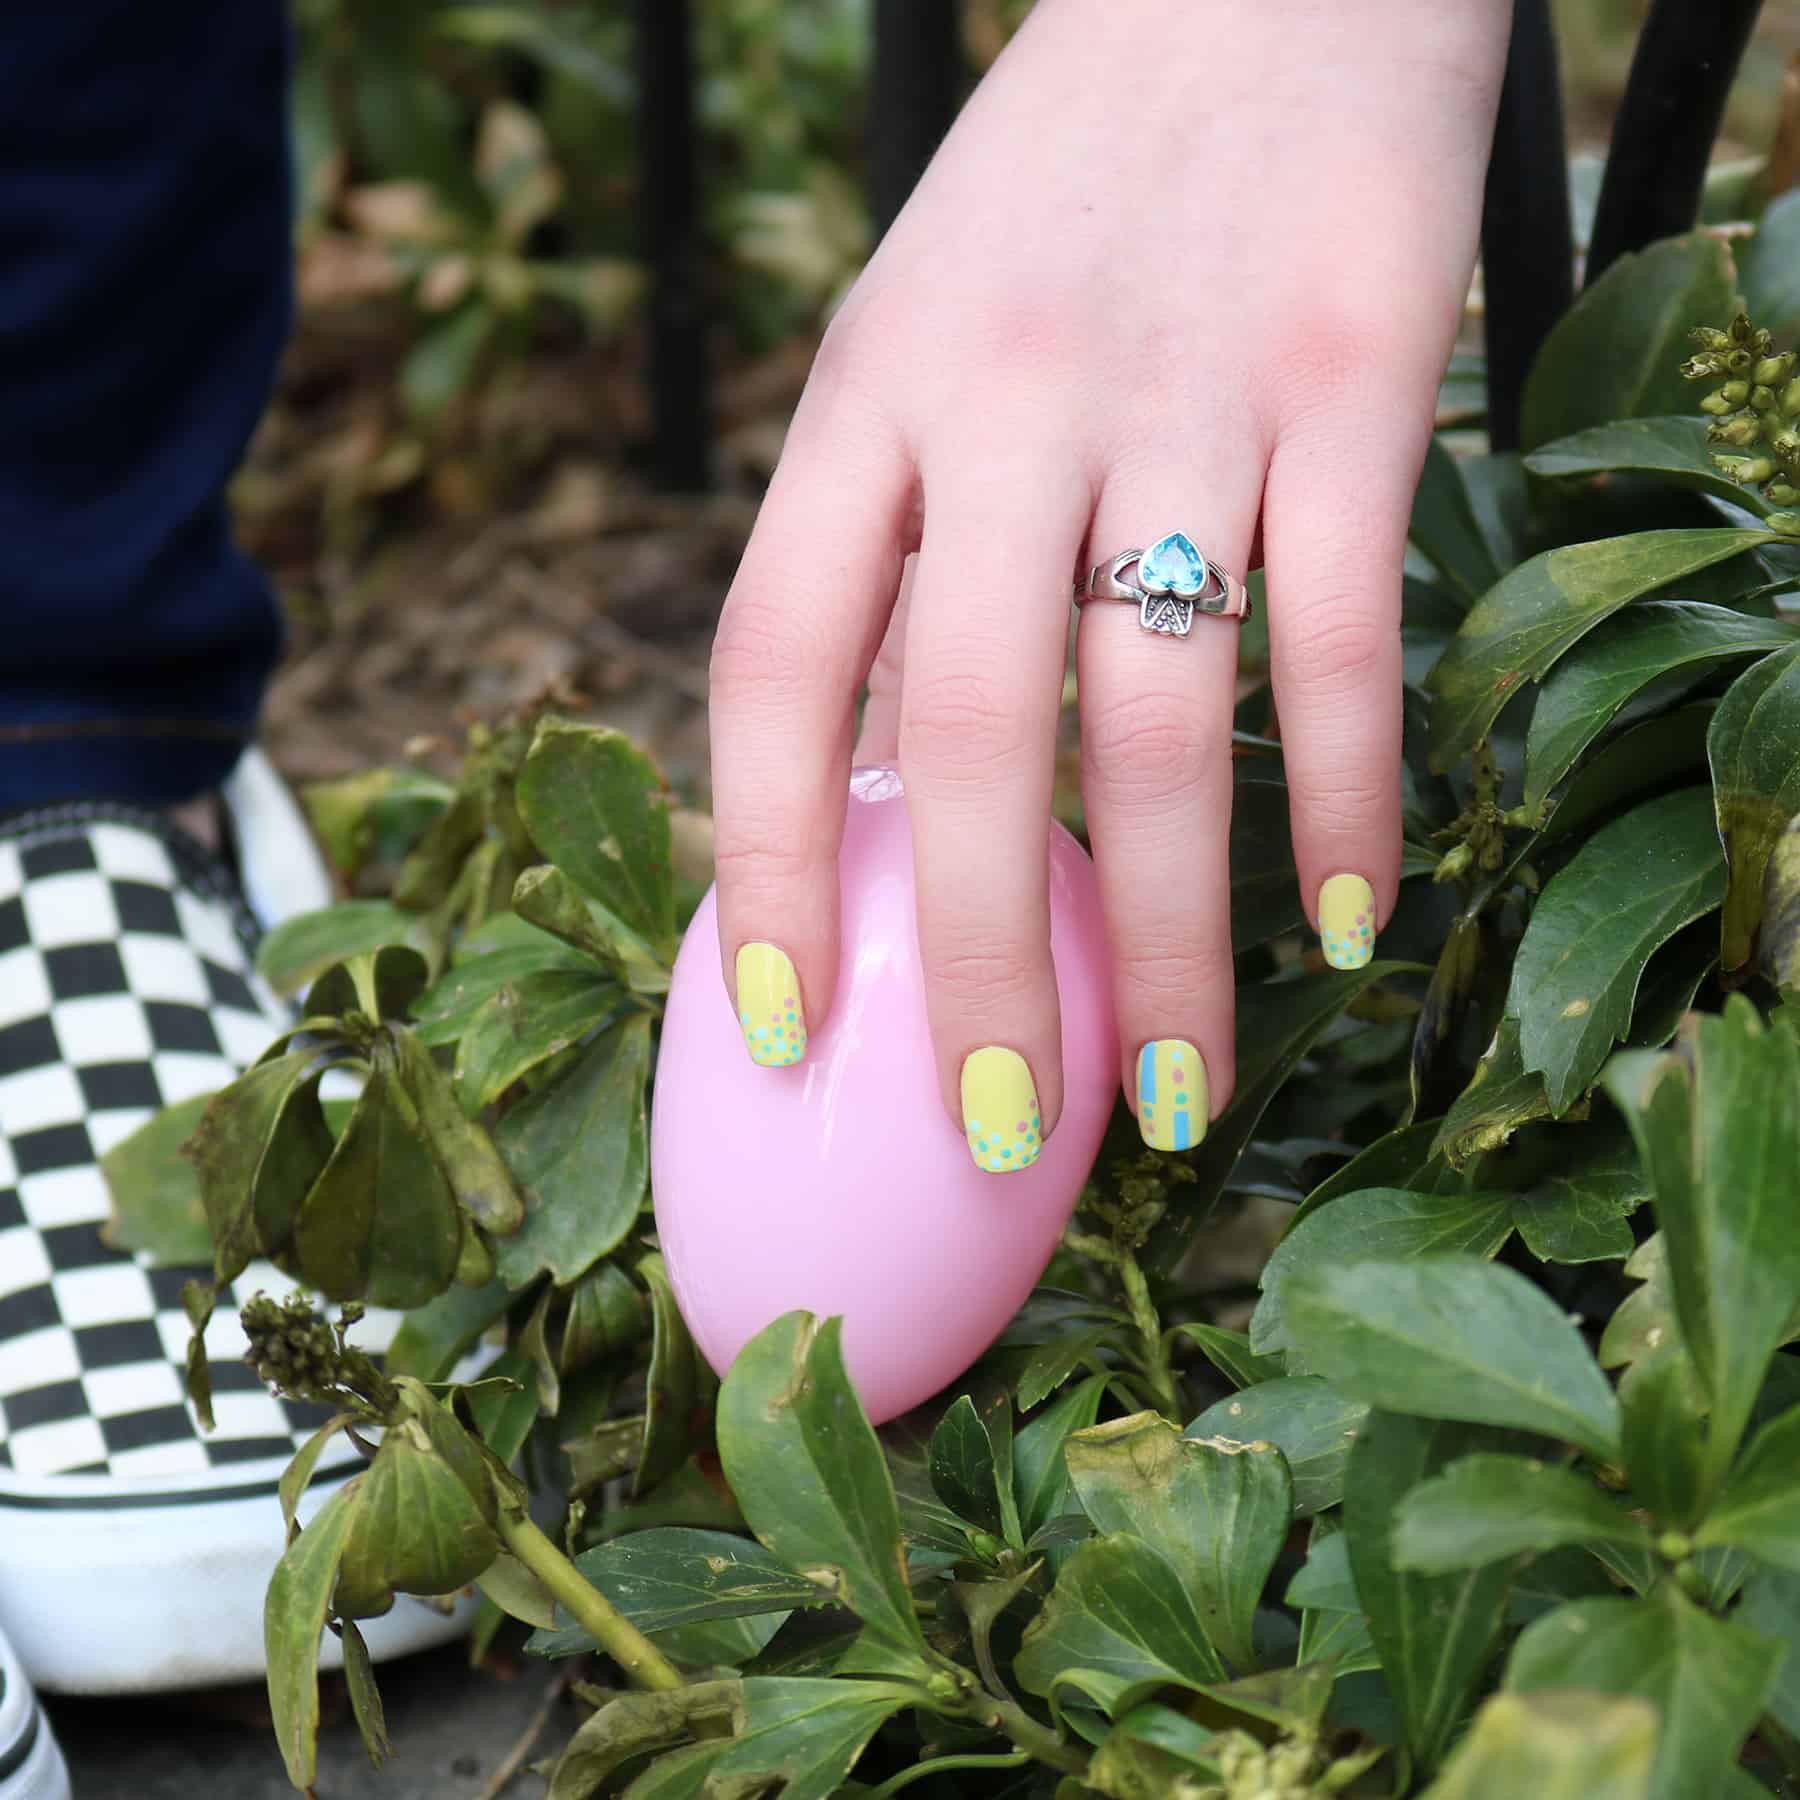
Step 2: Next, apply two coats of JINsoon Charme
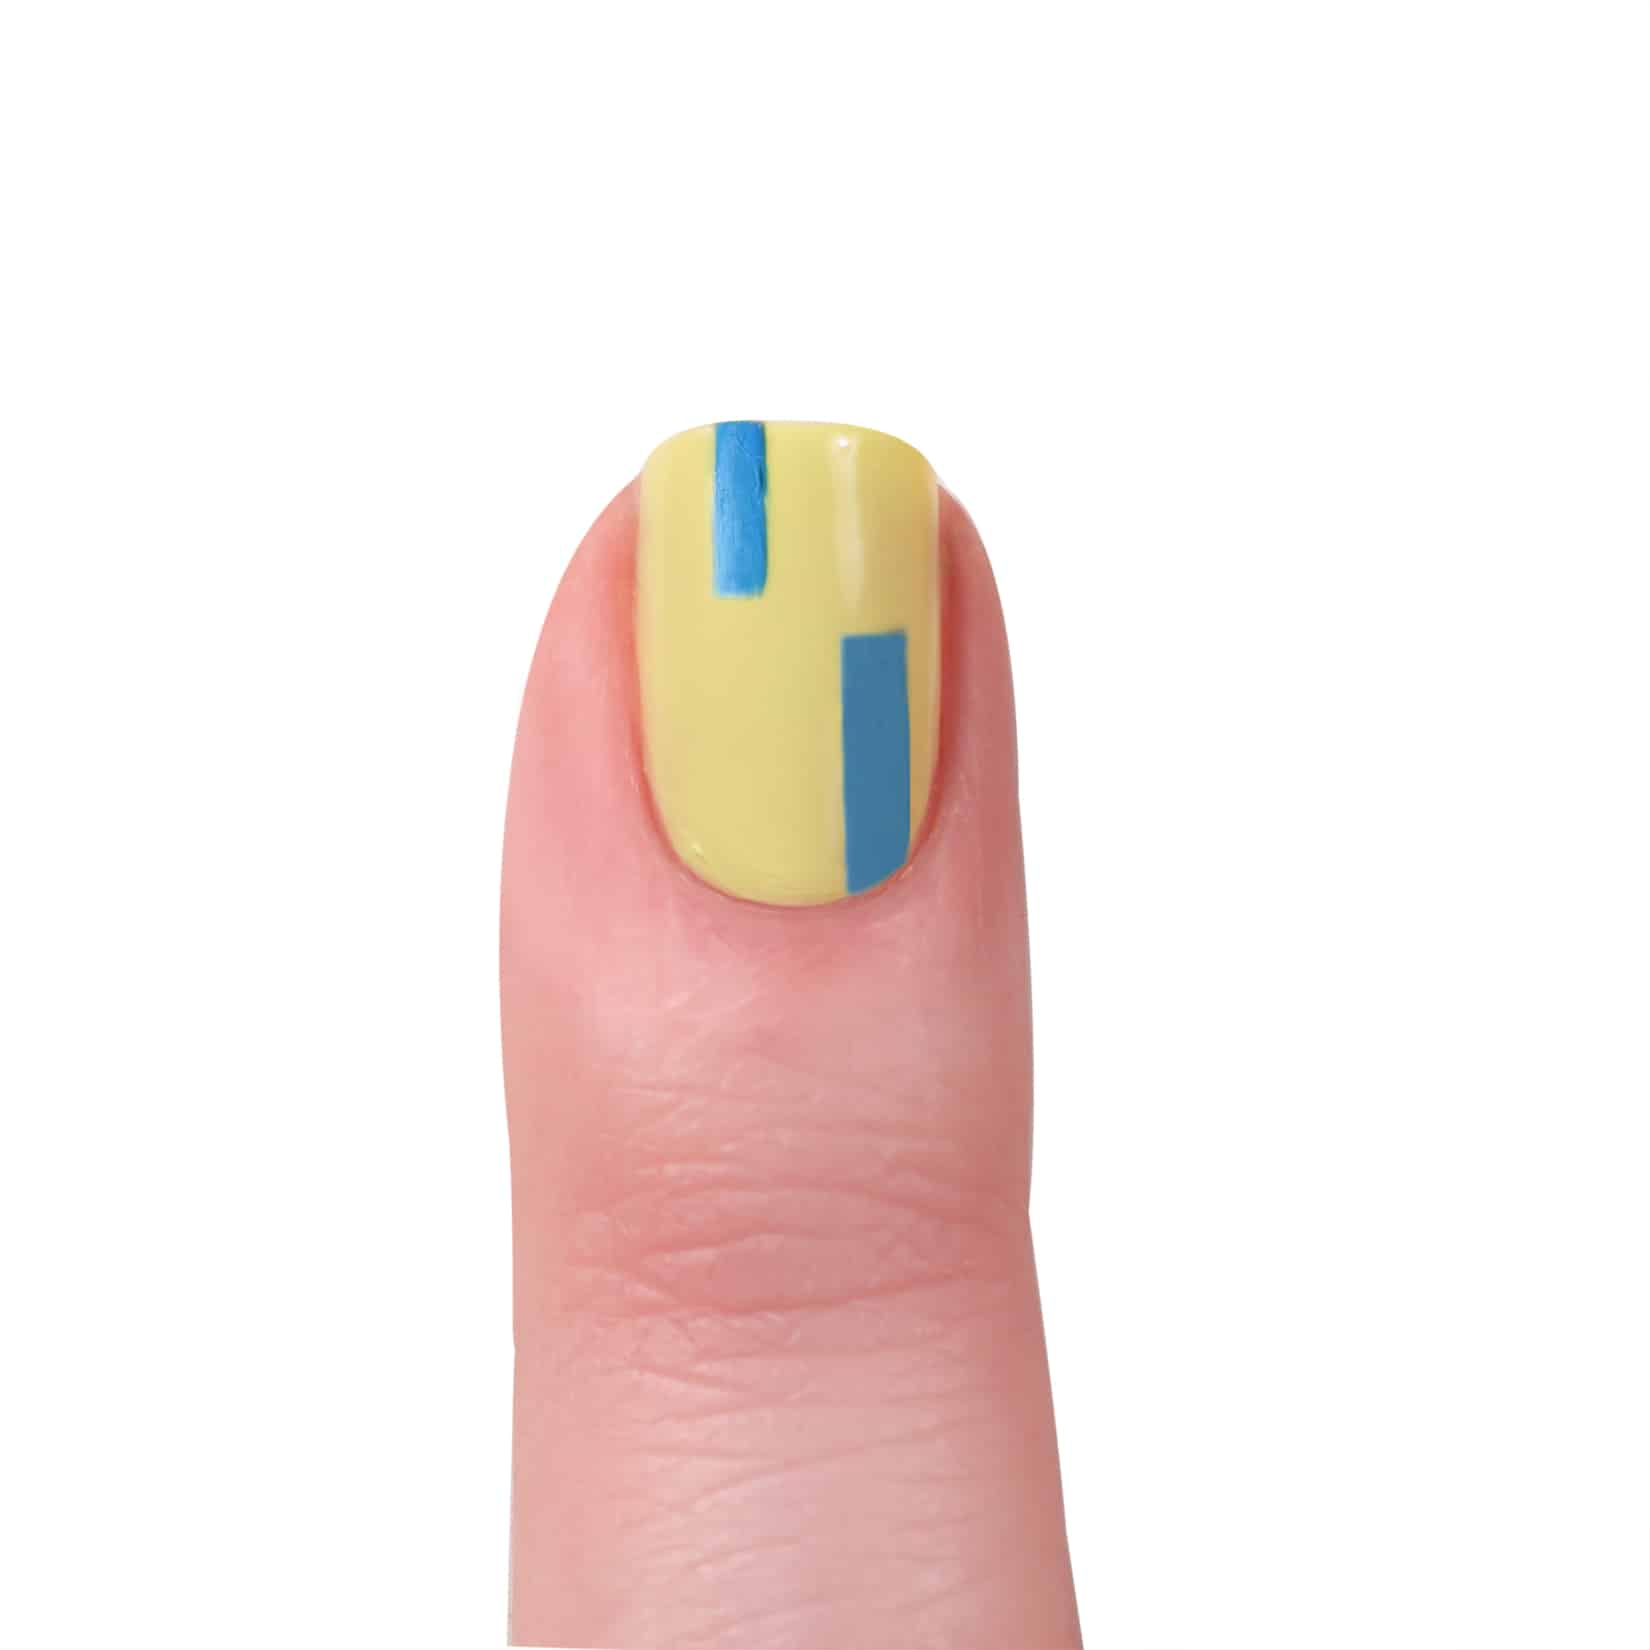
Step 3: With a striping brush, draw a thin rectangle shape, from the left tip towards the base of the nail stopping at the middle using JINsoon Aero. The, draw a second rectangle from the right cuticle edge towards the middle of the nail and fill in the shapes created with Aero.
Step 4: Place three dots using colors of your choice using a dotting tool. The colors shown here are: JINsoon Keppel, Moxie, and Peace. Begin placing the dots at the end of the rectangles, moving towards the tip of the nail.
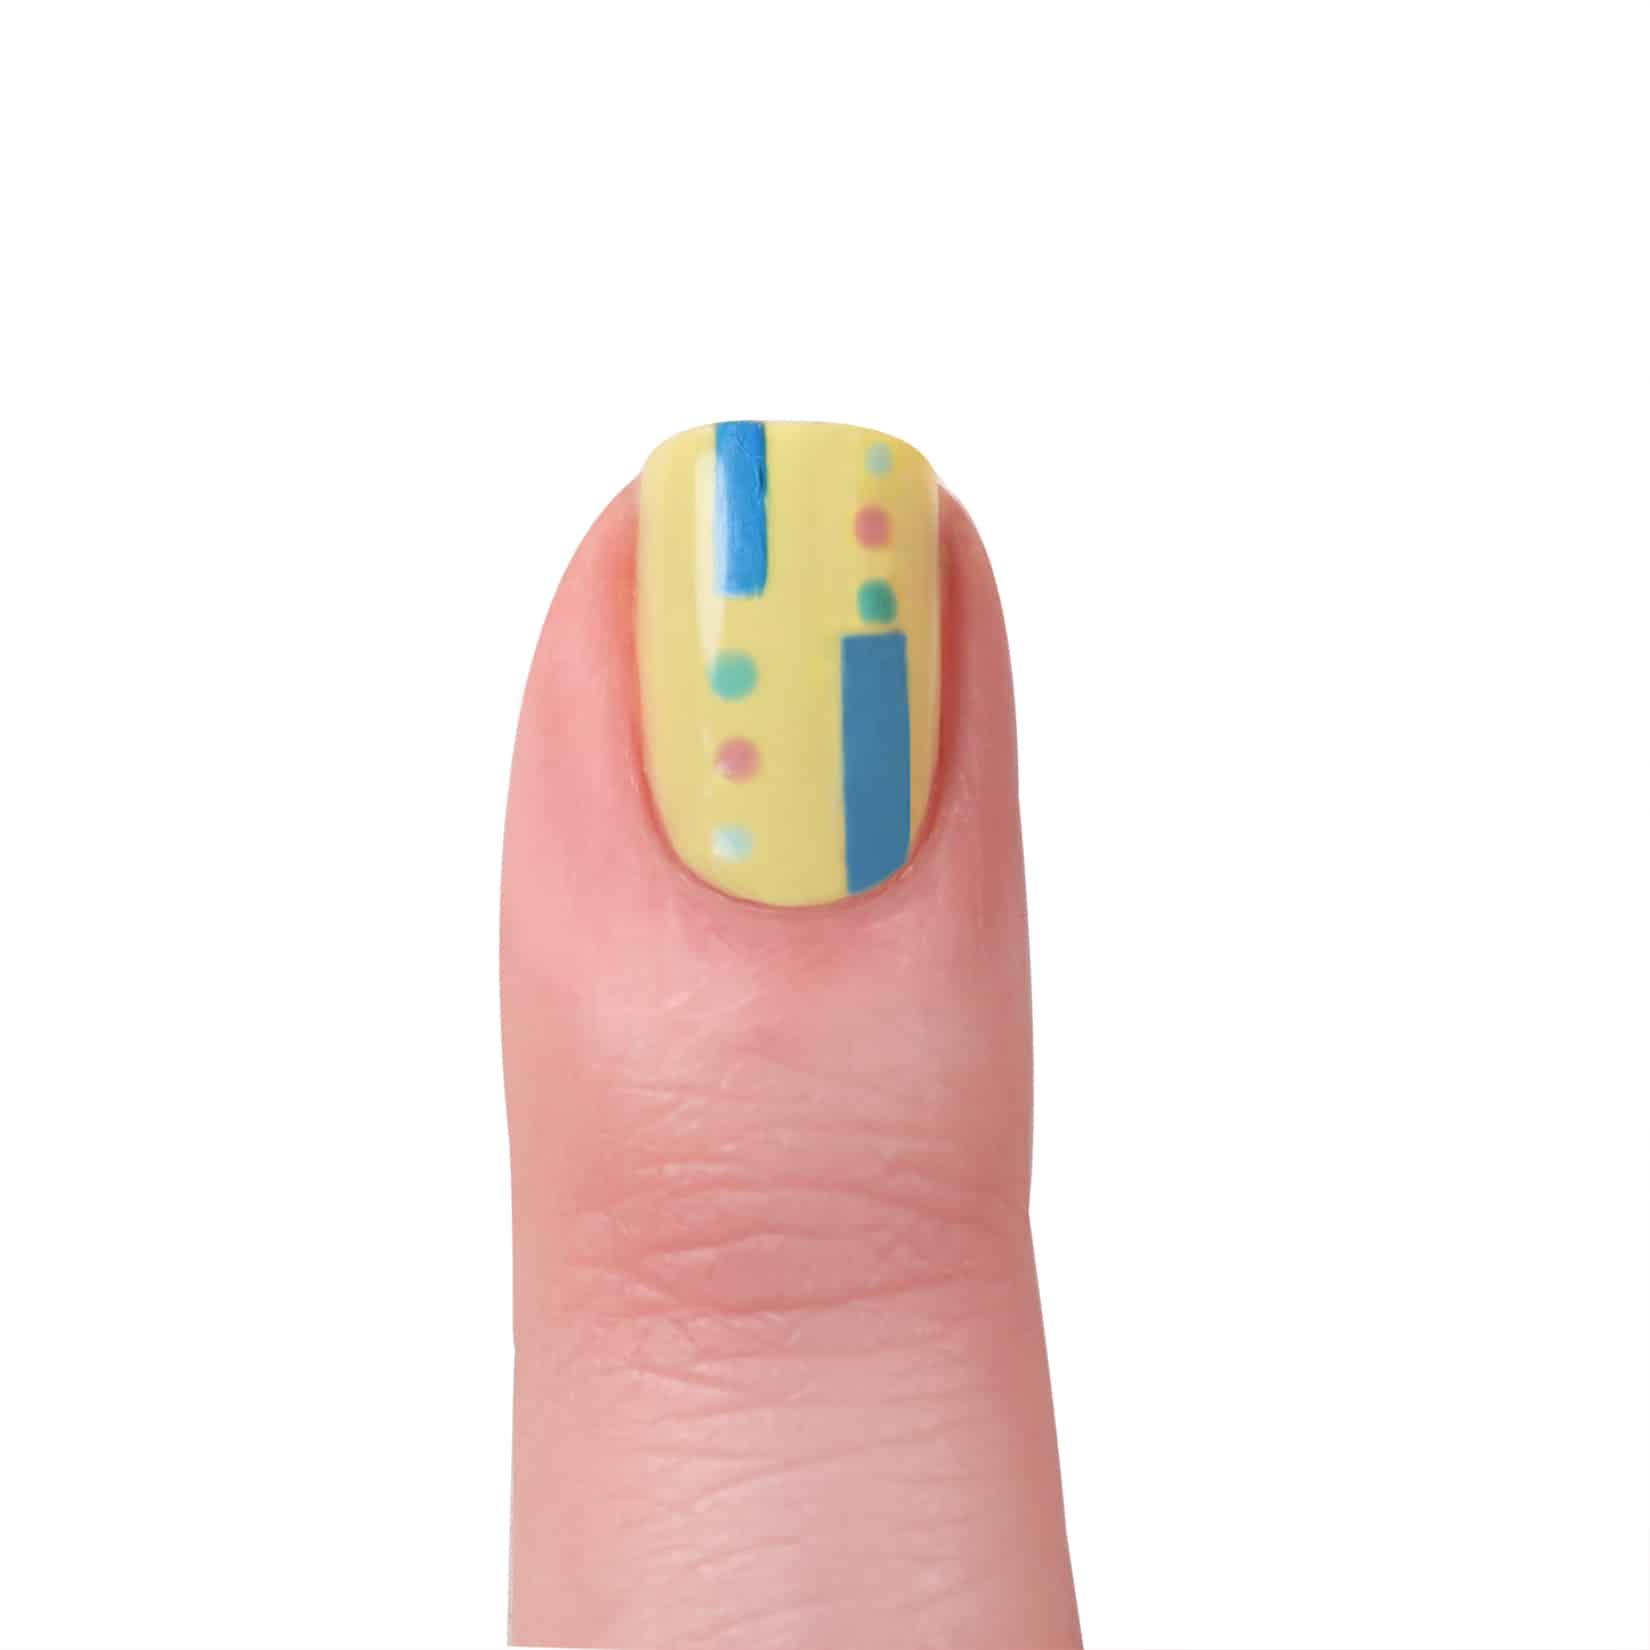
Step 5: Apply JINsoon Top Gloss Top Coat all over the nails
Step 6: Repeat steps 1-3 for all other nails using the dotting tool to place dots in a random pattern with the three colors you chose for step 4, covering about half of the nail. Apply Top Gloss to remaining nails.
Need more inspiration? See are huge list of Easter nail art designs here and here!
Shop the Post

One Comment